Here are the moss sheets from the dollar tree. I only needed 1 of the bags, the other one is for a different project at another time.
This is what the underside of the moss sheet to give you an idea of how it all stays in place and how easy it is to cut since its on this mesh backing.
I first started off by adding hot glue to the front of my letter.
I then placed my letter on the back side of the moss sheet. Remember I want the front of B to have the moss so you have to flip your letter and be sure to use the back of the moss.
Gluing the moss to the letter beforehand keeps it from moving as I begin trimming the moss.
Its a bit of a messy project so you have been warned. See the moss clippings on my counter, that totally looks like something I have seen in a baggie while in college...just saying.
Here is my moss covered letter B. It looks cute just where it is perched upon a window but I have seen these on mantels for Spring decor, used on wreaths or just by itself hanging from a mirror or door with ribbon.
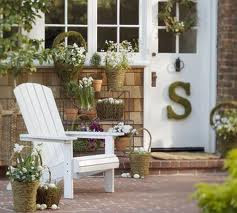
I have no idea who's house this is but I love the moss covered "S" hanging from the door and Im jealous of their porch. So cute....and no watering required.


No comments:
Post a Comment